Student Absence-Recording and Submitting Transactions to SAIS
![]()
|
|
Estudiante Student Tracking Software Student Absence-Recording and Submitting Transactions to SAIS
|
|
Absence transactions report the time that a student is not present for a planned day. i.e. a student misses class on a "membership day". For data entry purposes the students day is broken into quarters and the smallest absence increment is 1/4 of a day. For reporting to SAIS absence is submitted in minutes. Quarter day is converted to minutes base on the minimum-instruction-per-day as specified by ADE. Minimum-instruction-per-day is entered when you define Estudiante tracks.
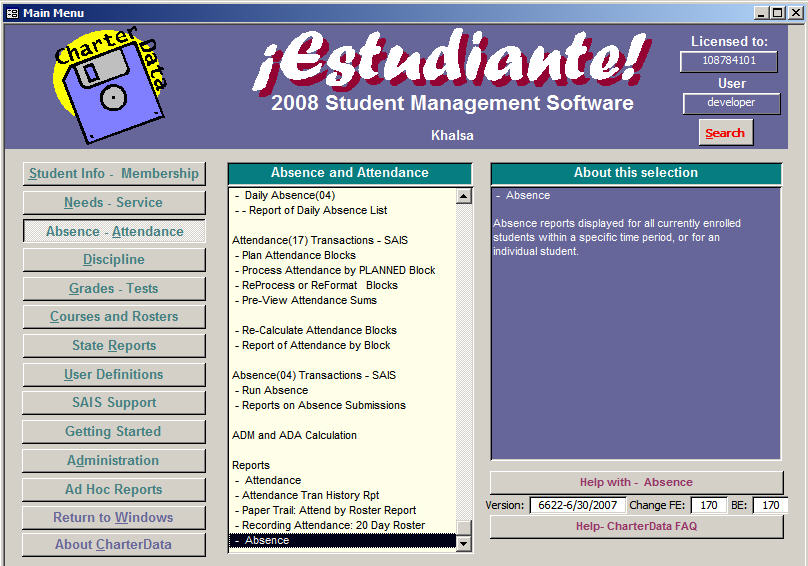
Absence is found on the main menu under Attendance. The absence sections are Data Entry - Daily Absence and Absence Transactions- SAIS. There are also reports in the reports section.
Some suggestions you may find helpful.
To obtain the latest specifications see ADE publication "Transaction Overview"
|
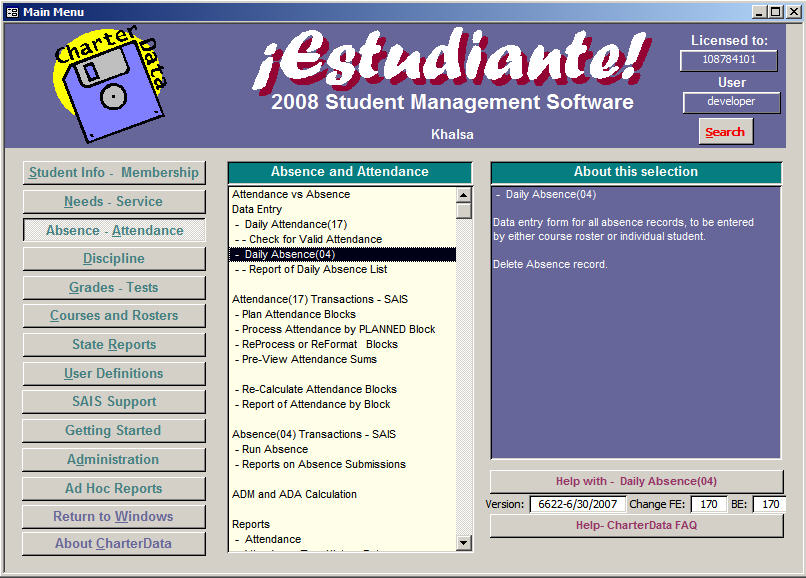 |
To start go to main menu/Attendance and
Absence Double click on Daily Absence(004)
|
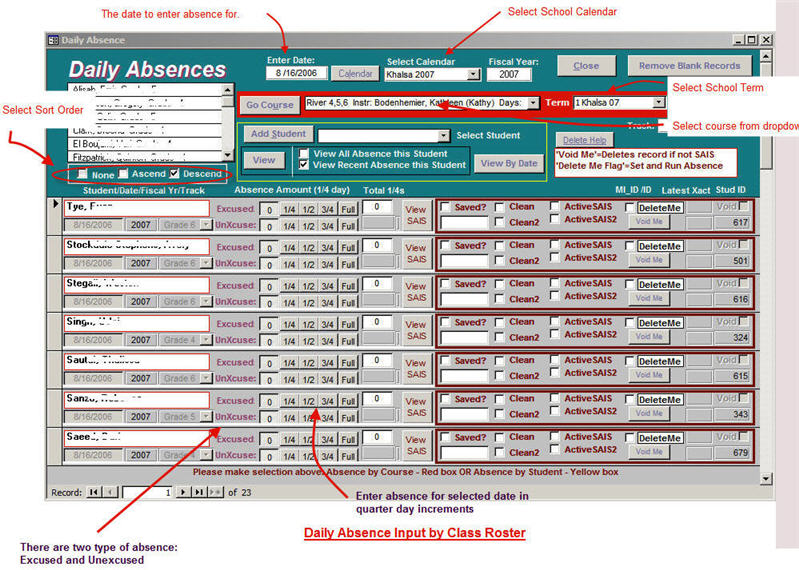 |
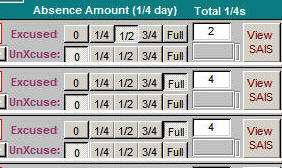
Daily Absence by Class RosterThis will be the primary method for entering absence for your school. When you set up your courses and enroll students in the classes, Estudiante will create a class roster. This method of entering absence uses that class roster to create a list of all enrolled students in a format that the data entry person (can be the teacher or a designated staff person) will only need to check off absence for those in the list who are absence. Click on the screen dump to the left to view the layout of this form. Absence by Quarter DayADE has specified that absence will be recorded and submitted to SAIS in quarter day quanties. That is a student can be absence for a quarter, half, three-quarter or full day. To facilitate data entry a control is provided that allows user to select absence by quarter day as follows.
Select the length of the absence and the total in 1/4 day will be computed. This total is converted to minutes (based on your school day) before sending to SAIS. Notice that there are two types of absences i.e. Excused and Unexcused. These two type are submitted separately to SAIS. Procedure for entering daily absence base on course roster
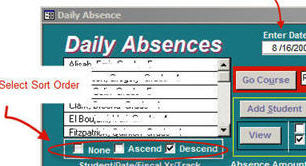
At this point the absences will be entered in Estudiante database. Later you will submit absence to SAIS by "Run Absence" procedure. Sorting by Student NameTo facilitate data entry user may sort the absence record by name. The options are ascending, descending or none. After setting the option click on "Go Course" button to reorder the records.
|
|
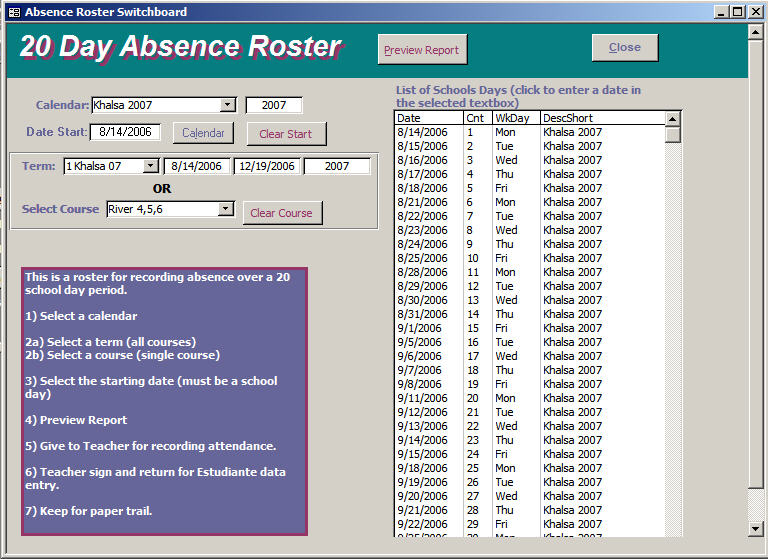
Print Roster for Recording AbsenceThis prints a roster which is handed out to teacher for recording student absence. The competed report can be used for entering absence into Estudiante. It also serves as hard copy backup which may be required for audit. 20 Day RosterStart from Main Menu/Absence and Attendance/Recording Attendance-20 Day Roster. Fill in the information on the switchboard:
A sample roster screen dump is shown to the left. |
|
|
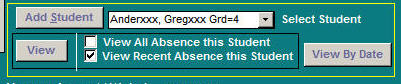
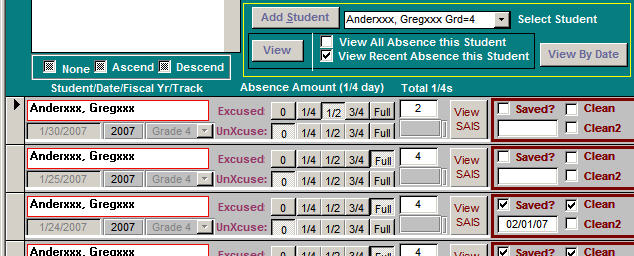
Daily Absence by StudentThere are several situations where it is advantageous to enter absence for an individual student (rather than by class roster).
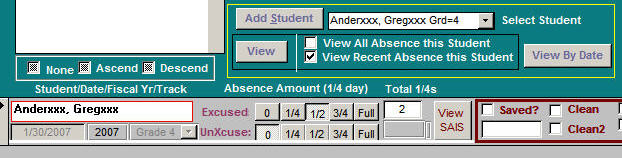
All of these items can be done using the controls that are enclosed in the yellow box on the form as below.
Enter am Absence Day for Student
Select the absence duration in quarter days. In this example student Gregxxx Anderxxx had an excused half day absence. That is all there is to it. The absence is in Estudiante database and will be submitted to SAIS will all other absences. Correct an Absence
The software will
automatically sense the change you made to the absence
record and will send the appropriate transaction to SAIS
when you Run Absence Review-Browse Absence Records for a StudentThe procedure to review is the same as for Correct Absence described above.
|
|
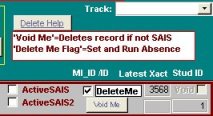
How to Delete Absence recordThere will be time when it will be necessary to delete a daily absence record. For example, when a student is marked absence when the student has actually left school. In this case there will be absence records beyond the withdrawal date which must be deleted from both the Estudiante database and the SAIS database. Start in the Daily Absence section. You will be using the portion of the screen shown in screen shot to the left.
There are two situations where you will need to delete absence transaction records. These will require different actions for deleting the absence record:
|
|
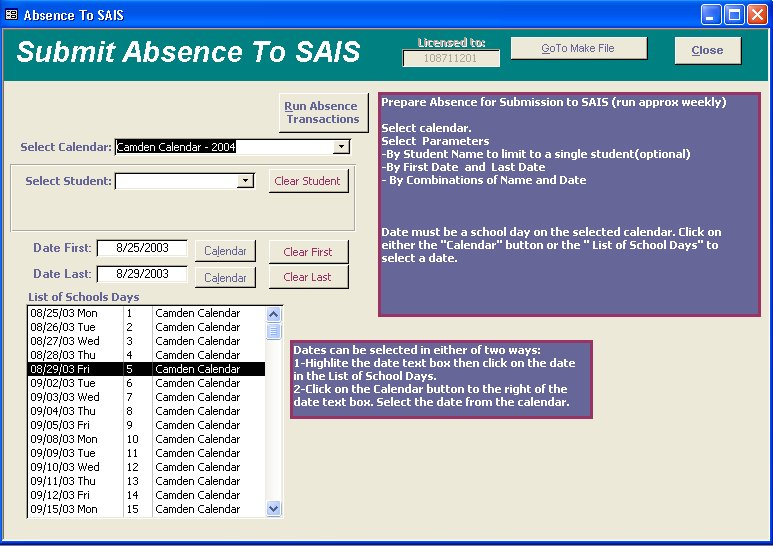
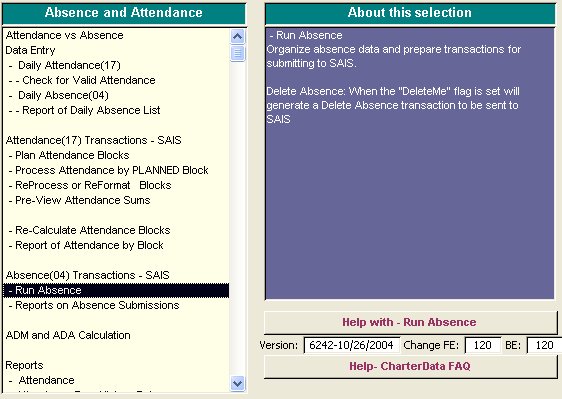
Run Absence - Submission of absence to ADE/SAISDouble click on the "Run Absence" menu item. This will open the "Submit Absence to SAIS" form- see screen dump to left.
|
 |
Re-Submit Absence to SAISThere are times when absence data will need to be re-submitted to SAIS. This is because SAIS rules say that all transactions for a student are automatically deleted within the SAIS database when an enrollment for that student is deleted. In this case there will be a mismatch between Estudiante and SAIS databases i.e. Estudiante incorrectly has the absences recorded. This requires an exception to how absences are normally submitted. Since Estudiante believes that the students absence have been submitted; running "Run Absence" will not create any transaction to be sent to SAIS because it seems to Estudinate that all is well and nothing needs to be done. Use the following procedure to re-submit absence for the student:
|
Remove Blank Absence RecordsBecause of the data entry method use, records with zero absence are created and some are not used (no absence entered by the user). These records will accumulate and will need to be deleted to avoid clutter. Click on "Remove Blank Records" to delete these records. Ideally this will be done after each data entry session but definitely should be done before each Run Absence and before running absence reports.
|
|
|
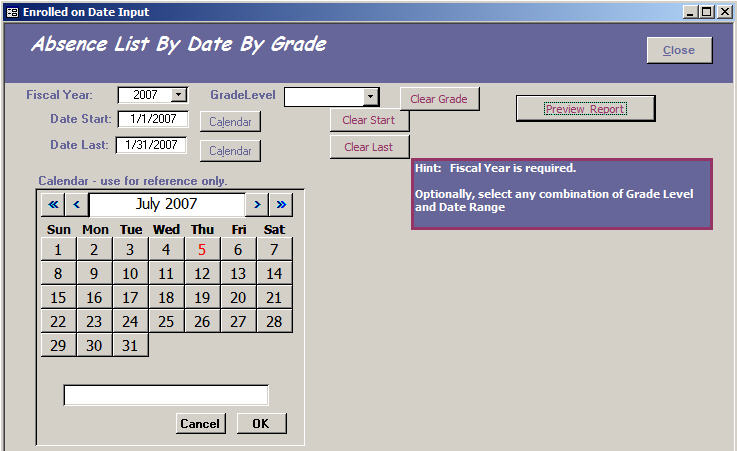
Report Daily Absence EnteredThis is a utility report of absence data during a time interval. In the sample report to the left the date range is 1-1-2007 to 1-31-2007. You may also select grade level for the report. The screen dump of the report input menu should be self explanatory with fields to enter date range and to select grade level. The report list all absence records with dates within selected interval. Also shown are some record status flags as follows
The calendar is for date lookups. Additionally if the curser is in a date textbox, when you click OK on the calendar the selected date will be transferred to the date textbox.
|
|
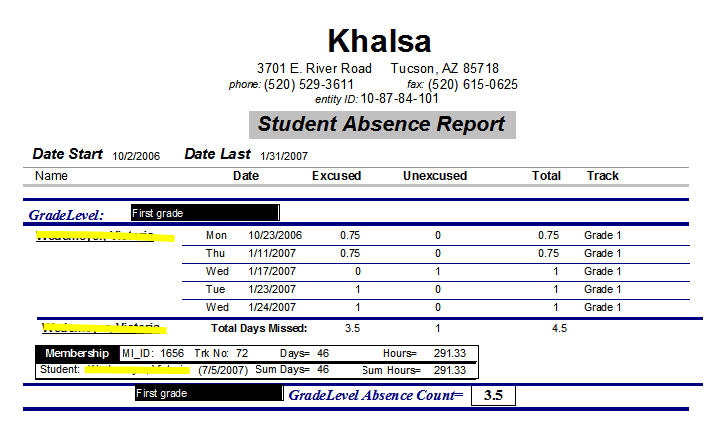
Main Absence ReportThis report give absence as reported to SAIS. It is useful for your own tracking and helpful with audits. There multiple report parameters as follows:
The report has two levels of detail
The screen dumps at left give example of this report and how to select options.
|